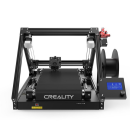
90% vormontiert:
- Der LK4 Pro vereinfacht die Montage. Die komplizierten Teile wie Ausleger, Portal und Düse wurden vor Verlassen des Werks zusammengebaut. 90% des Montageprozesses sind im Voraus abgeschlossen. Dies spart 50% der Montagezeit im Vergleich zu anderen Druckern und sorgt für eine bessere Druckqualität.
Vollständig Open Source:
- Ermöglicht den Benutzern, ihren Drucker im Hinblick auf den Quellcode zu verbessern und die Änderungen innerhalb der Community zu teilen, was zu einer verbesserten Erfahrung für alle führt.
Schnelle Erwärmung und Wiederaufnahme des Druckvorgangs:
- Das beheizte Bett kann in nur fünf Minuten seine Betriebstemperatur erreichen. Der Drucker ist durch seine Stromversorgung vor Spannungsspitzen und Stromausfällen geschützt. Wenn die Stromversorgung unterbrochen wird, können die Ausdrucke aus der letzten Schicht fortgesetzt werden, was Zeit spart und Abfall reduziert.
- Eingebautes sicheres Netzteil: Ist versteckt und unter dem Flachbett untergebracht, um die Sicherheit der Benutzer zu gewährleisten und die Druckstabilität zu erhöhen.
Introduction
This article is to help the LONGER LK and LK Pro series 3d printers users who want to upgrade with auto bed leveling sensor, like BL-TOUCH, 3D-TOUCH, etc. More information about senor please refer to the sensor datasheet.
Preparation
- LONGER FDM 3D Printer LK or LK Pro series
- BL-TOUCH, 3D-TOUCH or other similarsensor
- Sensor attached wires(5pin)
- Sensorattached screws and nuts(2 pairs)
- Sensor mount(printed .stlmodel)
- USBcable
- Pronterfaceor other serial port communication software
- 50kohm or 100k ohm resistor(LKx series users only)
Wiring
- Switch-off the printerpower
- Findthe position of motherboard, then screw down the mother board
- Unplugthe Z-MIN wire(2 pin) in board
- Hookup the sensor and the LKx series users need parallel a 50 or 100k ohm resistor between 5V pin and PWM pin as the picture
- Screw up the mother boardcover
LKx series board wiring need extra resistor

LKx Pro series board wiring

Mounting
1. Removethe Z axis end stop switch as picture showing below
Remove the z min end stop switch

2. Screwdown left 2 screws of head module
3. Mount BL-TOUCH as picture showing below
Mount sensor

Power on
- Confirm BL-TOUCH wiring and mounting iscomplete
- Switch on the printerpower
- ConnectPC and printer with USB-cable
- Flash BL-TOUCHdedicated check the firmware update manual if you need.
- Open pronterface software, select serial port(115200 baudrate). and connect to printer
Adjusting z-offset
- Clean up bed and nozzle, and ensure no materials stick on
- Send M851 Z0 to reset Z offset value
- Send G28 to homing XYZ axis
- Send G1 F60 Z0 to lower Z axis to the software origin
- Send M211 S0 to inactivate software endstop function
- Placea sheet of paper (or other block of 10mm approximately) on the bed and use the pronterface to lower the nozzle 1mm by 1mm then 0.1mm by 0.1mm until you feel a friction on the sheet of paper (the paper is not to be jammed but not too free either). Then remove the sheet.
- Send M114 to get current Z height value(usually negative). the value is the z-offset we
- Send M851 Z x.x to set z-offset(x.x is the value of previous value)
- Send M500 to save current
- Send M211 S1 to re-activate software endstop function
- Send G28 Z0 to home Z axis
- Send G1 F60 Z0 to test if Z axis could back to the actual Z origin by checking the clearance between bed and nozzle if is about 1 mm (thickness of a sheet of paper). If not, please repeat step 1 to 11.
Activating auto leveling
- Send G28 to home XYZ axis
- Send G29, and waiting for bed tilt measurement to complete
- Send M500 to save measurement values of previous
- Send M420 S1 to activate auto leveling function
Replace GCODE
- Replacewith new START GCODE(in appendix section) in your slicer software(Cura, Slic3r, Simplify3D, )
- Have fun! :)
Appendix
; -- BL-TOUCH START GCODE --
G21 ; metric values
G90 ; absolute positioning
M82 ; set extruder to absolute mode M107 ; start with the fan off
; confirm BL-touch safety
M280 P0 S160 ; BL-Touch Alarm release G4 P100 ; Delay for BL-Touch
; homing
G28 X0 Y0 ; move X/Y to min endstops G28 Z0 ; move Z to min endstops
; reconfirm BL-touch safety
M280 P0 S160 ; BL-Touch Alarm realease G4 P100 ; Delay for BL-Touch
; bed leveling G29; Auto leveling
M420 Z5 ; set LEVELING_FADE_HEIGHT
M500 ; save data of G29 and M420 M420 S1 ; enable bed leveling
; prepare hot-end
G92 E0 ; zero the extruded length
G1 F200 E3 ; extrude 3mm of feed stock G92 E0 ; zero the extruded length again G1 F4200
M117 Printing...
; -- end of BL-TOUCH START GCODE --
Files Download:
PC Software: pronterface-windows
Mouted Bracket: Bracket
Es gibt noch keine Bewertungen.